


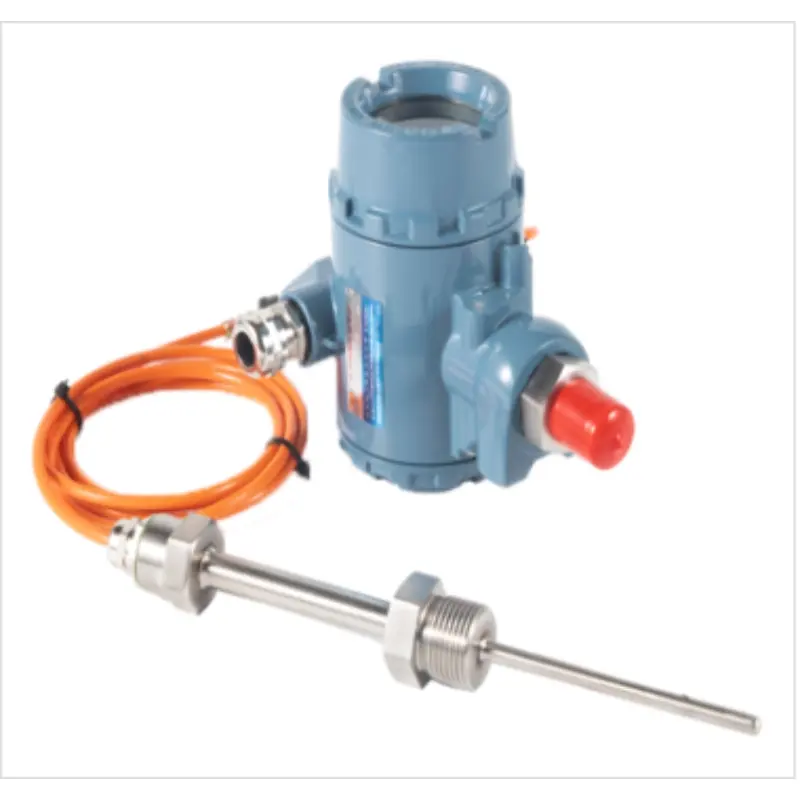
Integrated Temperature and Pressure Transmitter / Cellular Network Wireless Integrated Temperature and Pressure Transmitter HG39PTWB
Product Categories Temperature and pressure integrated transmitter
Oilfield pipeline pressure, formation pressure of wells that are often shut down, pressure monitoring and upper and lower limit alarms; Explosion-proof design: explosion-proof aluminum shell, circuit board system is intrinsically safe; Protection level: IP68, fully sealed and waterproof design; The instrument can set alarm enable, upper and lower limits, delay, dead zone, maximum range, minimum range, decimal places, upload frequency, acquisition frequency, change alarm, and other parameters. LED indication: reset indication, configuration mode indication, network access indication, data acquisition indication; 4.5-digit LCD display: pressure data, battery capacity icon, upper and lower limit alarms, and other parameters. Adjustable installation direction: connected to the on-site pipeline valve through a live joint or adapter, the direction can be adjusted.
1. Features
- Oil field pipeline pressure, well formation pressure, pressure monitoring and upper and lower limit alarms;
- Explosion-proof design: explosion-proof aluminum shell, circuit board system is intrinsically safe;
- Protection level: IP68, fully sealed waterproof design;
- The instrument can set parameters such as alarm enable, upper and lower limits, delay, dead zone, maximum range, minimum range, number of decimal places, upload frequency, acquisition frequency, change alarm, etc.
- LED indication: reset indication, configuration mode indication, network access indication, data collection indication;
- 4.5-digit LCD display: pressure data, battery capacity icon, upper and lower limit alarms, and other parameters.
- Adjustable installation direction: It can be connected to the on-site pipeline valve through a union or adapter, and the direction can be adjusted.
2. Performance indicators
- Working environment temperature: -40~70℃
- Ambient humidity: 0~95%RH, no condensation;
- Protection grade: IP68;
- Explosion-proof mark: Ex ib II C T4 Gb, explosion-proof certificate: CE18.2230X;
- Power supply: ER34615 lithium thionyl chloride battery (standard: SJ52278/1), two primary batteries connected in parallel, capacity 3.6V 38Ah; battery connector HG-2P (female: pin 1 positive, pin 2 negative) connects to the instrument; power supply voltage range, 3.0V~3.6VDC;
- Battery continuous working time: ≥1 year (pressure acquisition frequency 1 time/min, communication frequency 1 time/h);
- Battery replacement method: Open the instrument panel back cover and quickly replace the battery using the standard HG-2P interface;
- Long-term stability: drift, ±0.1%FS/year;
- Measuring performance: range, 0~2.5MPa, 0~6.0MPa, 0~25MPa, 0~40MPa, 0~60MPa; accuracy, 0.5%FS; can be customized according to actual needs; in accordance with GB/T 28474.1, GB/T 28474.2;
- Temperature and pressure sensor: adopts piezoresistive core & PT100 platinum resistor package, overload capacity, 150%FS;
- Process connection interface: M20X1.5 or 1/2''NPT, can be customized according to actual needs;
- Communication mode: 4G (full network access, compatible with 3G/2G);
- Communication protocol: follow the "Cellular Network Temperature and Pressure Transmitter Communication Protocol" to achieve oilfield DMZ server access;
- Online debugging and setting function: With online installation without uninstallation, the instrument can be debugged and set through the instrument panel or the configuration serial port and computer; the setting data content includes:
- Remote communication working parameters: server IP address, port number;
- Measurement working parameters: alarm enable, upper and lower limits, delay, dead zone, maximum range, minimum range, decimal places, upload frequency, acquisition frequency, change alarm;
After the instrument is powered off, the setting data is retained;
- Online upgrade: It can be realized by configuring the serial port and using a computer without uninstalling the installation.
- Liquid crystal (LCD) display: LCD display area, length × width = 45 × 35mm, the background color is green, the display content includes real-time measurement value, pressure unit, instrument range, battery power, voltage, signal strength; the decimal point of the real-time measurement value can be set, and 2 decimal places are retained by default;
- Instrument housing: Made of aluminum alloy, the housing seal (gasket) is silicone rubber, and the front and rear cover threads are coated with vaseline; the dial diameter is 60mm, and the exterior color is RAL5007;
- Overall dimensions: length × width × height = 150 × 130 × 235 mm (MAX).
- Sampling interval: The sampling interval can be set from 1 to 60 minutes.
- Sending interval: 5 to 1440 minutes.
Explosion-proof certification parameters
- Explosion-proof certificate number: CE18.2230X
- Explosion-proof mark: Ex ib ⅡC T4 Gb
- Appearance structure and function introduction

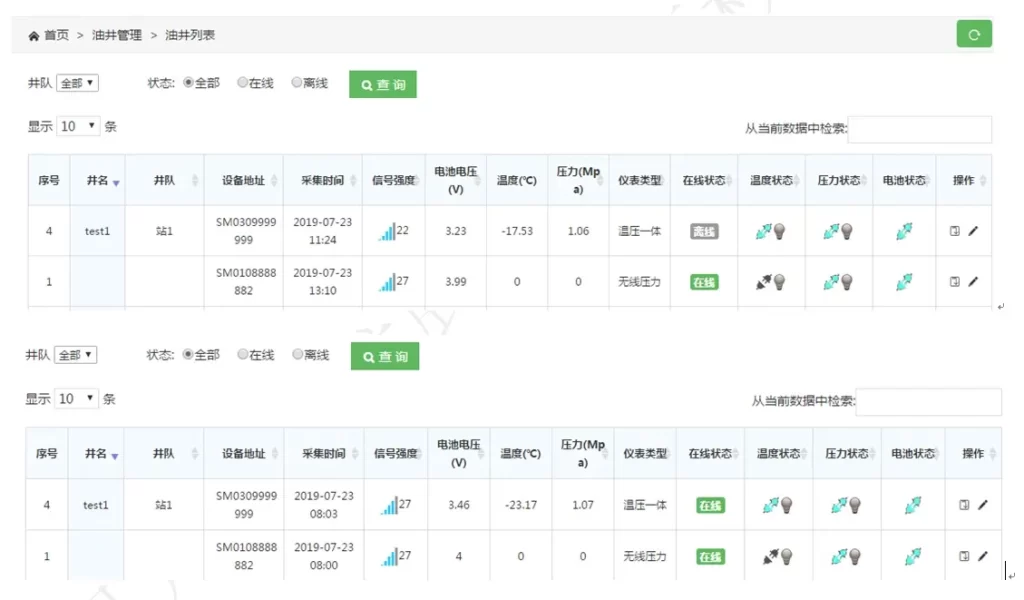
 Front panel LEDs: These have red and green colors. Red indicates pressure acquisition status and sleep/wake-up state, while green LEDs indicate NB-IoT network connection establishment status. Front panel reset: Using a magnet, position it directly below the front cover, pointing it upwards towards the reset arrow. Hold for 3-5 seconds, then remove the magnet. The red LED will flash three times, and the LCD display "8888" will also flash three times simultaneously, indicating a successful reset. The main purpose of resetting is to access the instrument to modify internal parameters, refresh the current pressure value, or re-establish a network connection. The back cover contains a battery, buttons, a power switch, and a USB debugging port. Functions are as follows: Rear panel K1: Due to the long reporting cycle of the instrument, pressing K1 during debugging will cause the instrument to actively establish a network connection and report the current pressure data. K1 is mainly used to test whether the network is functioning correctly. Rear panel K2: Due to the long reporting cycle of the instrument, some applications require real-time monitoring of the current pressure. During debugging, pressing K2 will cause the instrument to actively and continuously collect the current pressure for 300 seconds, with the LCD display updating synchronously in real time. This function only collects data on-site and does not upload it. K2 is mainly used for on-site pressure testing. Rear panel switch: The switch has three positions: upper, middle, and lower. The middle position is off, and the upper and lower positions are on. Rear panel USB: USB + debugging software, which allows for easy input of IP address, network address, and other debugging parameters. See the debugging software manual for details. Rear panel battery replacement: First, turn off the power switch. Remove the two M3 knurled screws by hand. Then, vertically remove the cover of the K1-K2 circuit board, disconnecting the HG black battery connector. Replace with a new battery, reinsert the HG connector, and then gently insert the K1-K2 circuit board vertically into place, aligning it with the pins. Finally, manually tighten the two M3 knurled screws. Turn on the switch. During the entire process, be careful to gently insert and remove the K1-K2 circuit board. Finally, tighten the rear cover. See the actual product photo below:
 The alarm status is displayed when an alarm occurs (upper and lower limit alarms are not displayed simultaneously). Only the main display area shows the alarm status of the physical quantity. Battery level is displayed according to battery level. Battery voltage is displayed as a percentage of the measurement range. The logo and network identifier are displayed. The logo is always displayed, and the network identifier is displayed according to the actual network status. The main display area is used to display the current physical quantity value, such as pressure or temperature, followed by the unit symbol. The auxiliary display area is used to display auxiliary information, such as the unit logo, NB-IoT signal network identification, battery voltage, etc. The unit is displayed according to the instrument type requirements and can be set in MPa or Kpa. ℃ Three physical dimensions on-site installation and use instructions 5.1. All transmitters are digitally calibrated and have complete consistency and interchangeability between different transmitters; 5.2. During transportation, all transmitter batteries are disconnected. When installing pressure transmitters on-site, it is necessary to unscrew the back cover of the meter head and turn on the battery switch. Be careful to tighten the protective sleeve to prevent water leakage; 5.3. To install a cellular network wireless temperature and pressure integrated transmitter on pipelines and normally shut-down wells, first close the valve (needle valve or gate valve) on the pipeline where the pressure transmitter is to be installed. Then there are two installation methods: (1) Screw the pressure transmitter directly into the upper port of the needle valve; (2) Screw the union or adapter into the upper port of the needle valve, and then screw the transmitter into the upper port of the union or adapter. This installation method uses the addition of unions or adapters to adjust the direction. After installation, open the needle valve to confirm that there is no leakage, then the installation is qualified; Install temperature probes on pipelines (1) Stop the pipeline, depressurize, and vent. (1) Make a hole on the pipe that is slightly larger than the outer diameter of the blind tube sleeve of the sensor probe; (2) Insert the blind tube sleeve vertically from the hole to the bottom of the pipe, and then seal and weld it to the pipe around the hole; (3) Inject heat transfer oil into the blind tube sleeve, about 1/2 of the pipe volume; (4) Insert the temperature sensor probe into the blind tube sleeve, adjust the direction of the meter head, tighten the union with a wrench, and restore the pipeline transport. 5.4. Connect the cable of the temperature sensor and the pressure transmitter with a waterproof connector and socket, and then pressure and temperature tests can be performed. After the installation of this cellular network wireless temperature and pressure integrated transmitter is completed, the network parameters can be set by the button or the debugging tool. 5.5. If the transmitter is not used for a long time, the pressure transmitter can be set to sleep mode by the debugging tool. (The transmitter is uniformly set to sleep mode or closed state during the factory storage process. It needs to be activated by parameter adjustment on site before it can be used normally.) The online list of the debugging software interface is shown in the image below: 6. Precautions 6.1. This product uses the ER34615M-3.6V38Ah battery; other battery models are prohibited. 6.2. The antenna casing is made of plastic and poses a potential hazard of static electricity! Avoid friction during use! Wipe with a damp cloth when cleaning!